


How to create a branch in PYLEECAN
The first step to work on a contribution is to create a “branch on git”.
What are branches?
A branch is a parallel version of the code that will cleanly isolate some modifications from the “official version”. It indicates from where “your version” of the code started and what was done step by step (or version by version) to get to your current state.
How to create a branch?
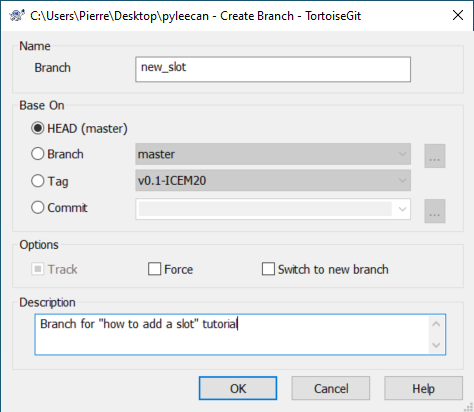
To contribute to pyleecan, the first thing needed is to create a “branch” on your forked version of pyleecan. In the following example a branch named “new_slot” is created by right clicking on the pyleecan folder then selecting “TortoiseGit” and “Create Branch”:
You then need to select your branch to start working on it. For that, right click on the pyleecan folder then “TortoiseGit” and “Switch/Checkout” and select the “new_slot” branch:
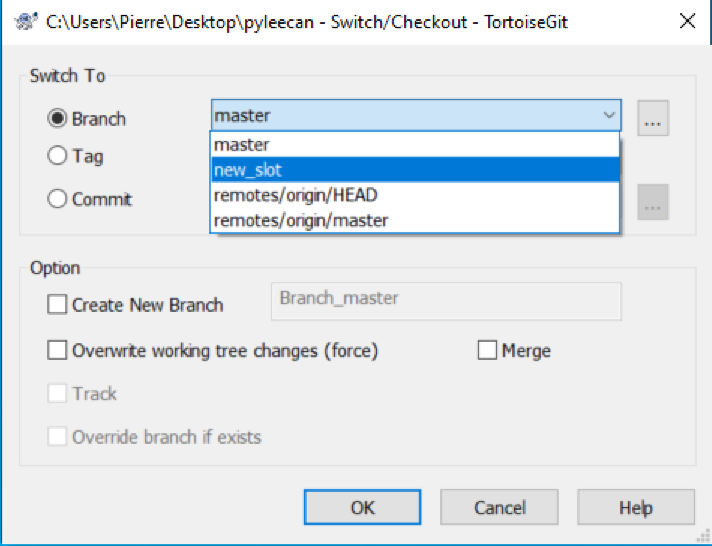
Now all further modifications will be added to the “new_slot” branch. It is possible to come back to the “original” code by “Switch/Checkout” to the branch “master”.