


How to install PYLEECAN to contribute
This tutorial will introduce some basic know-how on Git and Github which is the tool that will enable you to share your work with the community. There are lots of tutorials and videos on the web to learn about Git, the more you will learn the most efficient you will be if things get complicated. You can start with this tutorial from Github. This tutorial focusses only on the very basis that are needed to contribute to Pyleecan “as quickly as possible”. We recommend taking some time to explore some more detailed tutorials to better understand this powerful tool. In general, if you are not familiar with git, we strongly recommend using it for any valuable piece of code that you produce. It will significantly improve your work (and opening a repository on Github is free if you want to share your work).
What is Git?
Git is a tool that will track every single modification of a project. It will keep in memory the full history to easily know:
Who has done a modification, when and why?
What is the history of a single file?
As all the project is seen as an ordered list of modifications (a file is edited, deleted, created…), Git can do the following:
Get modifications from other users and merge it with yours
Cancel some modifications to come back to an older version of the code.
Step 1: Create a GitHub account
GitHub is an online hosting platform for projects monitored with Git, and has been chosen to host PYLEECAN. It is therefore mandatory to use GitHub in order to contribute to PYLEECAN.
The first step is to create your own GitHub account here.
Step 2: Fork PYLEECAN
You can then go the the pyleecan repository on GitHub:
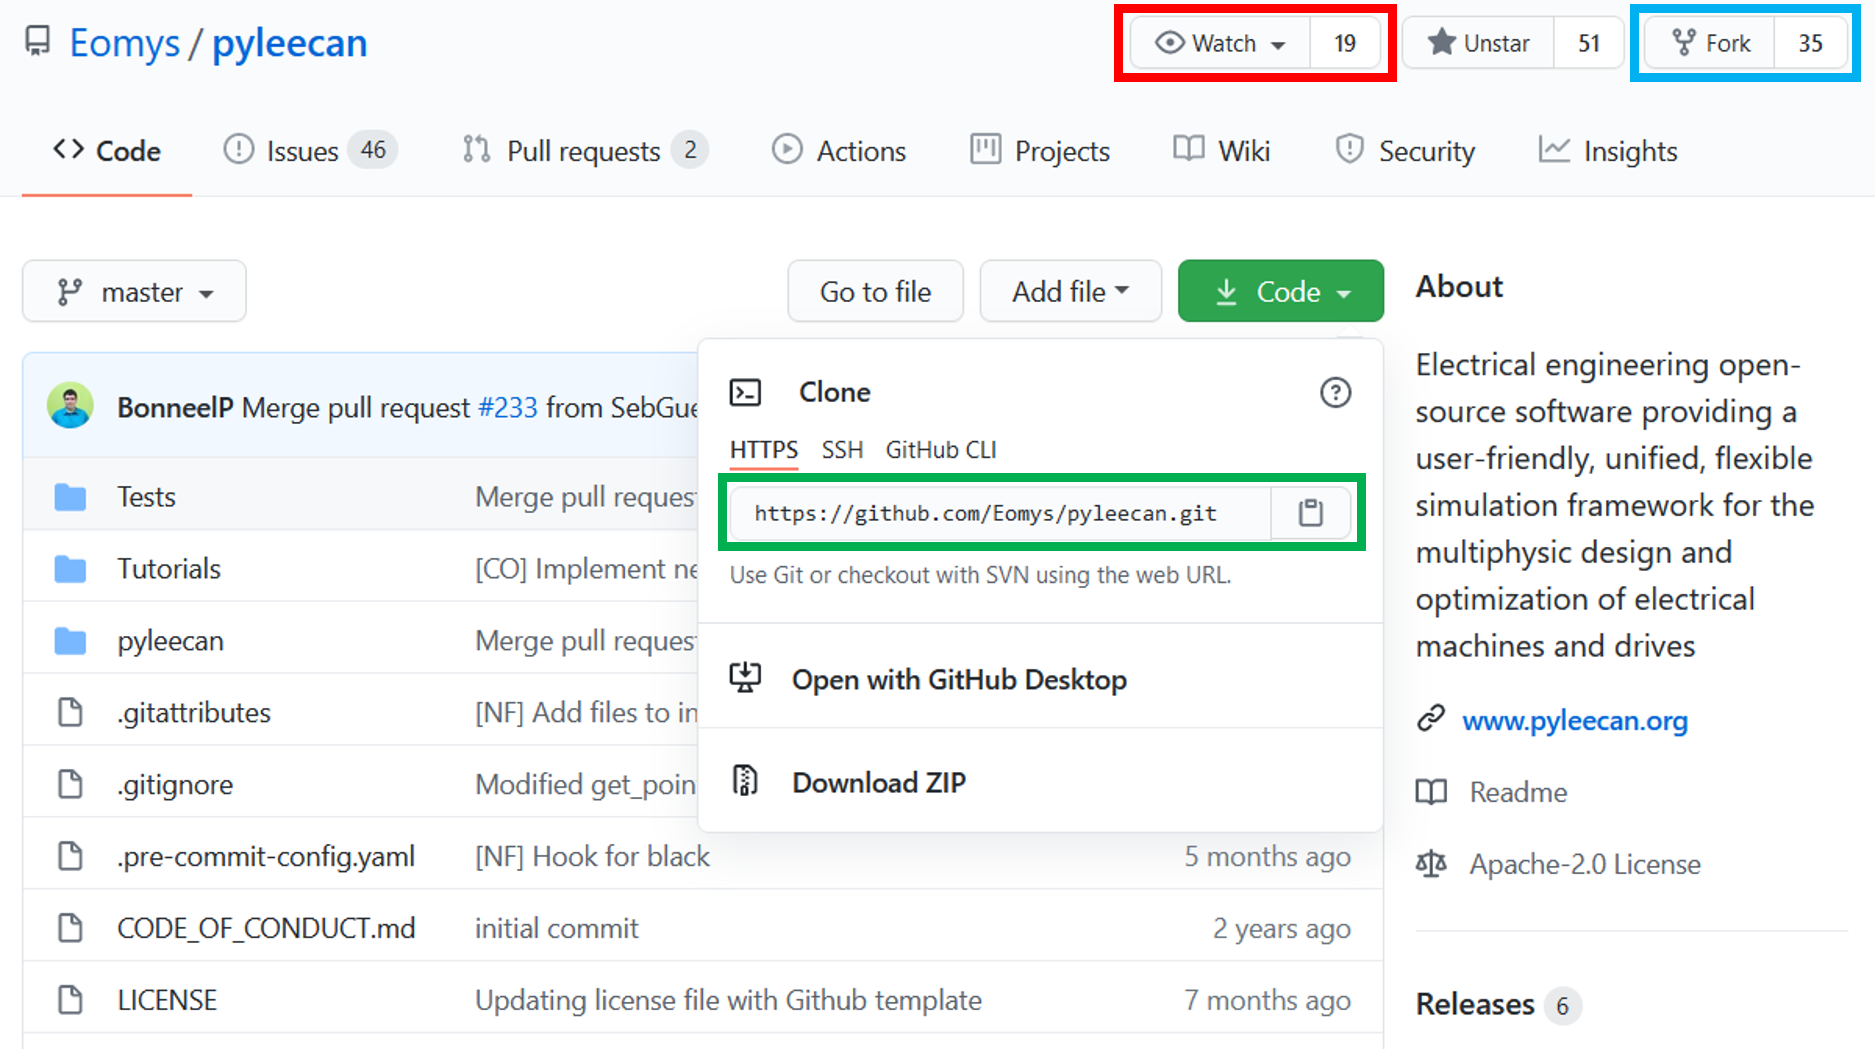
and fork the pyleecan repository in your own account, ie get a copy of the repository in your GitHub projects (click on the fork button in the blue square in the previous picture).
The forked repository will allow you to freely experiment with changes without affecting the original project. Later you will be able to send modifications from your fork to the main project on Github with a “pull-request” (see also this tutorial).
You can also click on “Watch” (red square on the picture) to choose how you want to be notified of the activities of the community.
Step 3: Download the source code
The next step is to download the source code from your fork.
For this method you will first need to install git or github desktop. For Windows users, you may also want to install Tortoisegit (or any equivalent) for a more convenient use of git.
Once git is installed you can “clone” the repository (either though command line or the tool you have installed with git) by getting the link on your fork (green square on the picture):
git clone https://github.com/<Your Github name>/pyleecan
This method will enable you to get the upcoming modifications of the Pyleecan’s code in a more convenient way.
Step 4: Install dependencies
Now that you downloaded PYLEECAN, you need to install the dependencies. All of them are gathered in the file requirements.txt. You can install them with one single command with pip (which should have been installed with python): :
pip install -r requirements.txt
You are now ready to contribute to PYLEECAN.